
Eduaction Management 959 Lahore
Code With Jahangir
CSS Selectors
FREE COURSES
FREE CERTIFICATE
CSS Selectors
So far we have just glanced at the basics of CSS, and you must have noticed me selecting the body tag every time I write any rule of CSS in the stylesheet.
In technical terms, it is known as a selector. It tells the browser on which portion of the HTML document the styling needs to be applied.
The syntax of the selector goes as follows-
There are primarily 5 types of Selectors.
1. CSS Element Selector
This is the only method that we have used so far in all our examples. It is used to select an HTML element which has a particular keyword.
But we don’t recommend using it in proper projects as there can be multiple times the same tag used in the document. So, overlapping of rules can occur in the stylesheet.
Eg-
We can see here, the output is applied to the individual elements of the code.

2. CSS ID Selector
As I said earlier if we use an element selector we can’t add uniqueness to each element. This is achieved by the ID selector. We can create unique IDs for each element property and use that for selecting that block of code.
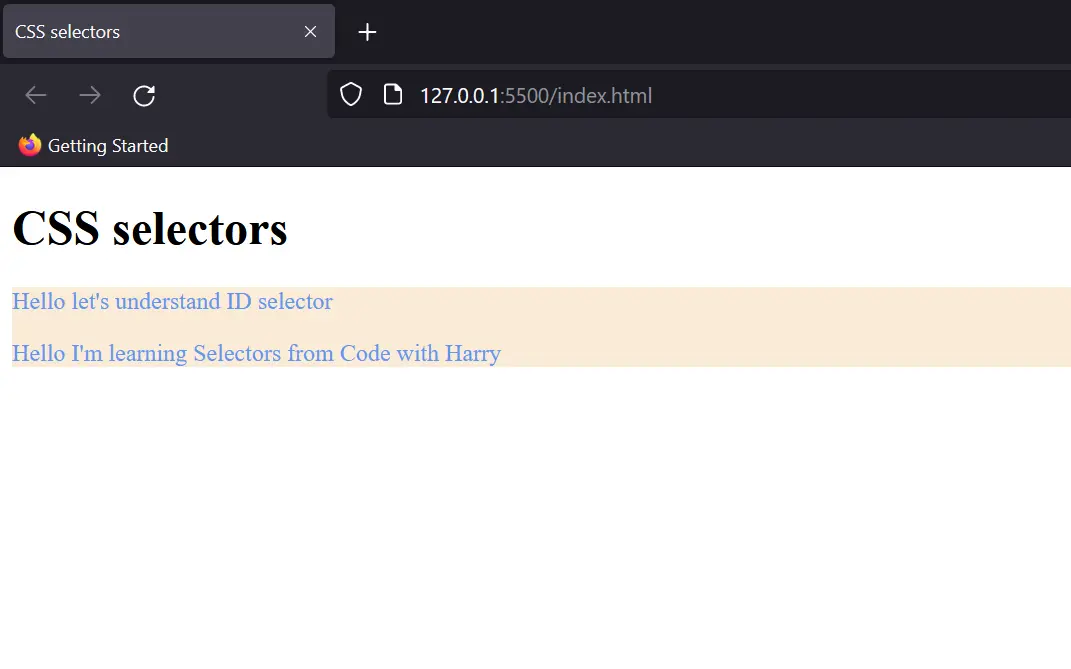
It is written with “#” followed by the ID name in the style sheet. But before that, we need to define it in the HTML document as well. Here’s an example-
Pay attention to how I created a division to use the id selector. You must be aware of div in HTML but just for a refresher, it is used to create separate blocks for refining the document structure.
I deliberately left an <p> in the div to show that the “id selector” tag will select every element present in the div.
The output of this code would be
3. CSS Class Selector
So roughly you can say that the class selector does the same job as the id selector; the only difference is we use the id selector for specifically one element of a unique type. On the other hand, a class selector helps us in grouping various types of elements. Like sometimes we need to style maybe a title and specific paragraph with the same rules. In that case, we can give the same class to both elements.
The syntax of a class selector is almost similar to the id selector, just “#” is replaced with “.”
Eg- .class-name{ property : value;}
So here’s a small assignment for you. You’ve to make this layout with just two class selectors. Try it out and then look down for the solution.
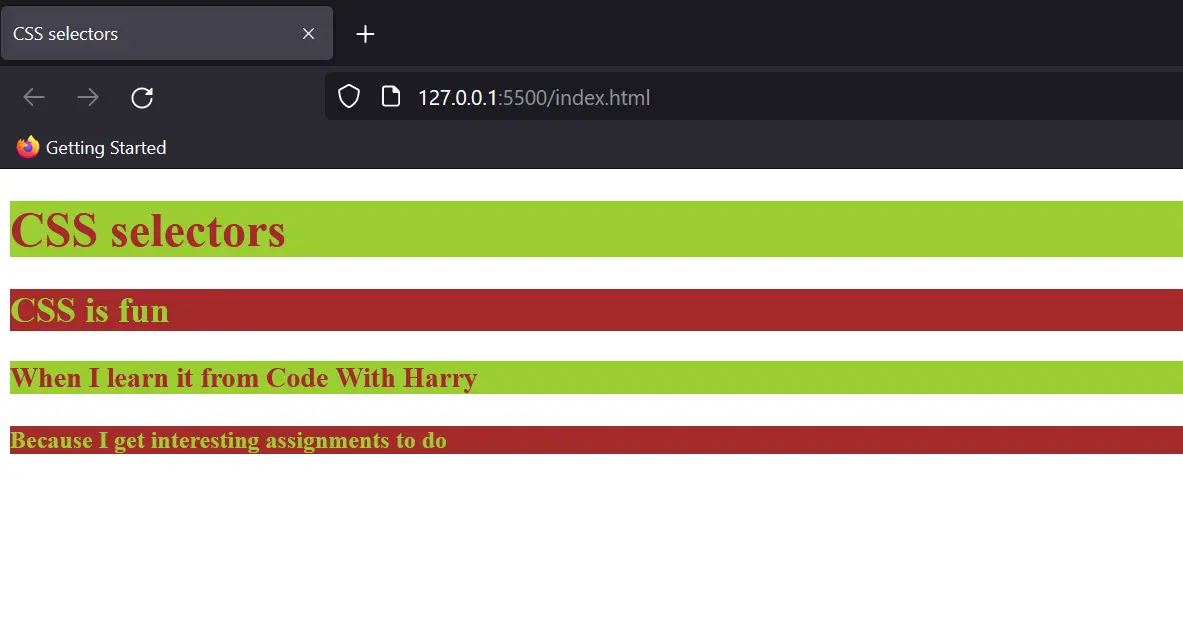
Notice how all of the 4 headings are different. So if you think to use an ID selector or element selector then you need to create 4 style properties. But with the class selector, it is cut in half.
Here’s the code of it, I hope you tried it yourself first.

Thus we can see a class selector helps in grouping two distinct elements. But what if you want to group everything?
4. CSS Universal Selector
A universal selector is used to group everything present on the page. Thus it comes in handy while structuring websites quickly. You’ll learn in detail about the situations in which a universal selector is helpful.
The syntax of a universal selector is simple. Just use “*” to use the selector.
Eg-
Run it yourself and see what output it is giving to you.
5. CSS Group Selector
Previously we just saw the use of class selectors right? There’s another way to do so as well.
A grouping selector is used to minimize the code. Commas are used to separate each selector in a grouping. This reduces the number of lines of code and yes! The code looks clean.
Eduaction Management 959 Lahore
Code With Jahangir
CSS Selectors
FREE COURSES
FREE CERTIFICATE